Wednesday, October 28, 2015

Throwback Post: Cars and Tape

Make a Super Simple road for cars...out of tape!
Photobucket
I saw this idea on Teach Preschool and could not wait to try it!

Here is what you need...

Painter's Tape
Photobucket
Cars
Photobucket

1.Use your imagination.
2.Make vertical and horizontal lines that intersect.
3.Put out the cars and invite the children to play.
Photobucket

Extras:
Buy more that one color of painter's tape!

Friday, September 25, 2015

Homeade Fire Station

Photobucket
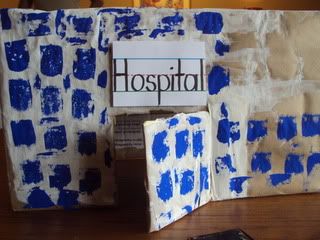
This week, we will be talking about modes of transportation. Allison, at No Time for Flashcards, made a hospital out of a cardboard box. We took the same idea, and made a Fire Station.

Materials:

A Cardboard Box
Clear Tape
Tempera Paint
A Black Sharpie Marker
A Knife or Sturdy Scissors
A Sentence Strip
Craft Paper or Butcher Block

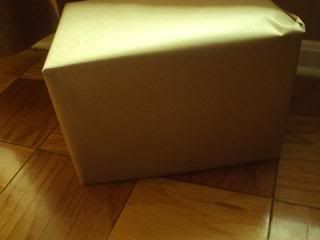
1.First, wrap the box with paper.
Photobucket
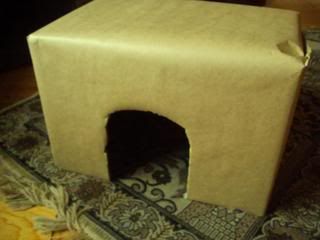
2.Next, cut an opening for the door.
Photobucket
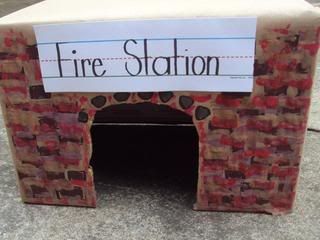
3.Use the Sharpie to draw your design.
Photobucket
You can also use a sentence strip to label the structure.
4.Paint your design.


I ended up using a sponge brush.


It made nice bricks.
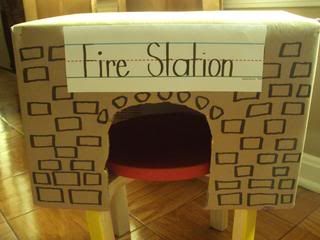
5.Let it dry.
6.Throw in a few fire trucks, and play!
Photobucket
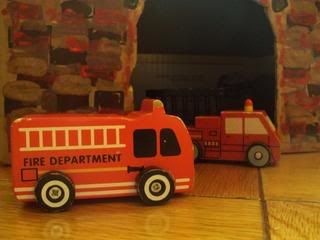
My son loved making the trucks go in and out of the station. He even made his other vehicles visit the station. My personal favorite was a taxi visiting the Fire Station.

He was so engaged, that I am thinking of making other structures for him to use with his vehicles. We made a hospital too.
.Photobucket
Any other suggestions?

Thursday, September 24, 2015

B is for Bat

Photobucket
The Letter of the Week is B. In order to help my son remember the letter, we connected it to something he already knew.Our Letter B was transformed into a bat. :)

Materials:
Construction Paper
Google Eyes
Scissors
Markers
Glue Stick

1.First, I set out markers and paper for my son to color.
Photobucket
2.Meanwhile, I cut out the various parts of the bat. (The "Letter B", Ears,Mouth,Teeth,Wings)
3. When my son was done coloring, I set out all of the other supplies.We talked about the letter B and I helped him glue things to his paper.
Photobucket
All done!
Photobucket

Abc Sensory Table


  I  was literally cleaning, when this activity came to me.
It is a reminder that we can make great learning experiences with what we have around us.

 What do you have that is just laying around the house?
How could you use those things to trick the kids into learning?

For this activity I used bears and letters. I found a container, but you can use a bowl. I chose to use the center to promote letter awareness...but this could go so many ways.


As an extension, I laid out white boards and dry erase markers. The students would say the letters  and write them.  After I set this center was set out, I went to the dollar store and added tiny tongs for pincer grasp and fine motor development.

   Need other ideas? Check out these sensory tubs:

                                                              - Plastic bottle tops with letters/numbers written on them.
                                                              - Beans,  and Scrabble Tiles
                                                              - Magnetic Letters, Cups and Noodles
                                                       

Thursday, September 10, 2015

S is for Spider

Photobucket
Not only is this craft cute, but it reinforces the concept of bugs/insects. It was super easy to do! Here is how...
Supplies:
Photobucket
Paint
Paper
Paint Tray
Paint Brush

Photobucket
Scissors
Craft Google Eyes
Yarn or String
Glue


1. First, paint the palm of the child's hand. Transfer the palm print to the paper.This will be the spider's body.
Photobucket

2.Next, paint FOUR fingers on each of the child's hands.Make a print on each side of the spider's body.This will be the spider's legs.


3. When the spider has dried, glue the eyes on.
Photobucket
4.Cut the spider out.
Photobucket
5.Cut a hole out at the top of the spider.Add yarn or string. Display and enjoy!
Photobucket

Car Crayons

Crayons

I saw a set of "homemade" transportation crayons on No Time for Flashcards. She melted old crayons and used a candy mold to make new ones. I was pretty eager to try it.I had a feeling that my tot would love them!
Photobucket
Here is what I did...
I went to the craft store in search of a candy mold, like the one Allison used. I could not find it. However, I found this pretzel race car mold.
It was only $1.99.
Photobucket
I set the oven for 275 degrees.
I began to peel the paper off of our old/broken crayons.
Photobucket
I put the crayons in muffin cups and put them in a muffin tin.Photobucket
I put the muffin tin in the oven and allowed the crayons to melt.
I poured the melted wax into the mold and let it sit for an hour.
Photobucket
I popped the crayons out of the mold and detached the back end
(the pretzel part).
Photobucket

Finally, it was time to color!


Yay,new crayons.

Photobucket


Yay! New crayons!

Fall Sensory Bin

Photobucket
Check out our "Fall Themed" Sensory Table! I love Fall, especially the colors. I saw this lentil soup mix at an Amish shop.The colors reminded me of Fall.Thus, instead of eating the soup mix,we played with it!
Photobucket
 I filled a shallow plastic container with the mix.Next,I added lots of tools for scooping,pouring and measuring. If you can't find soup mix like this one,you can put it together yourself! You will need lentils of various colors and brown rice. This activity reinforces Science Development and Hand-Eye Coordination.Trust me,it will be a big hit!

Hurray for Fall!